Have you fallen victim to the Pinterest craze yet? I know many of us have and use it religiously to keep some of our favorite recipes, organizational tips, and even those favorite phrases + sayings that we want to remember.
But recently I've seen a boat-load of comments on my Twitter + Facebook streams about peeps feeling sort of "lost" on the site simply because they couldn't figure out how to "pin" something. I'll agree that although the site still has a lot of room for improvements, I think it is pretty straightforward and can become such a great resource if you can figure out the best way to use it to your advantage.
So, here's my no-frills, simple tutorial on "pinning" on Pinterest. I hope this is able to help some of you out there who are struggling with getting going on the site. And while you're there, why not follow me on Pinterest? I'd love to connect with you there! Happy Pinning!
1. Once you login to the site from this link, you'll see something similar to this (bear in mind if you have zero pins you will see empty boards instead of ones with photos in them like in mine below):
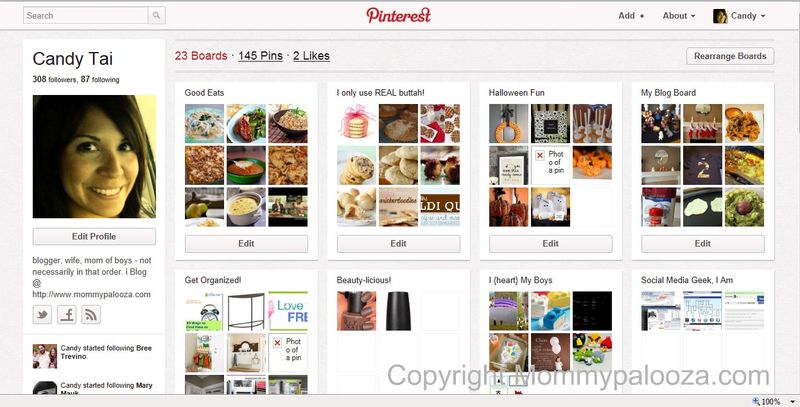
2. Click the "Add+" button in the upper right hand corner. This will then show a new screen like this one:
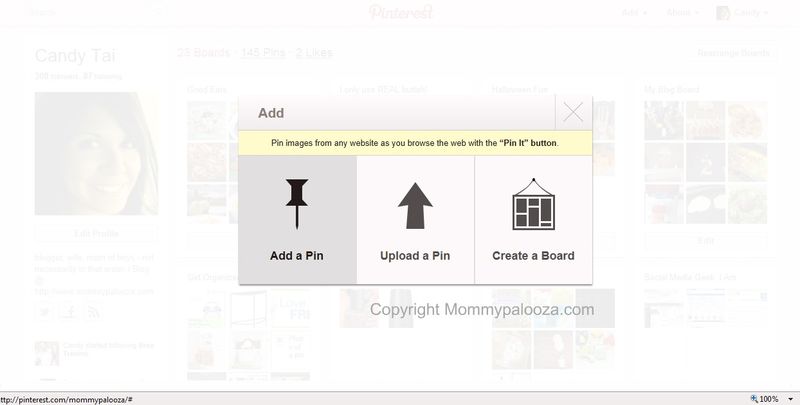
3. Click the "Add A Pin" option. This type of pin will allow you add a website/url/video/pretty much anything online that you have a link for.
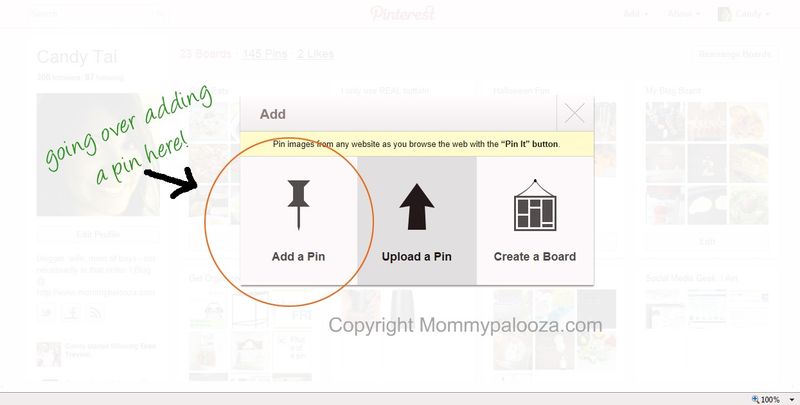
4. You're then taken to an upload screen where you'll be prompted to enter the url (website address or link to) whatever it is you are wanting to pin.
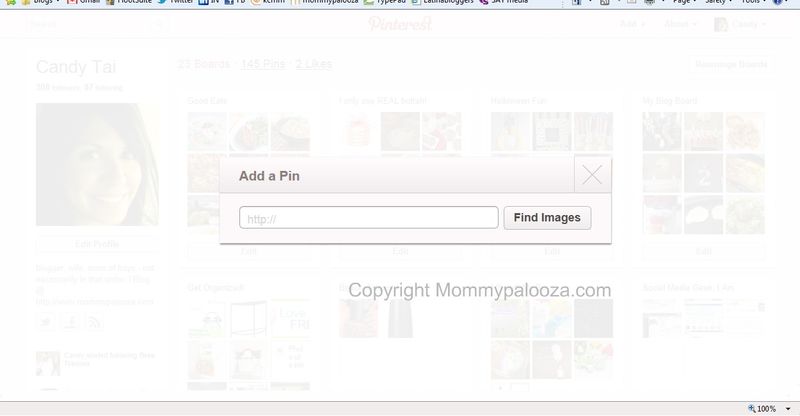
5. Copy and paste your link from its source into the box. Or, alternatively you can simply type in the entire link / url of whatever it is you'd like to pin, like so:
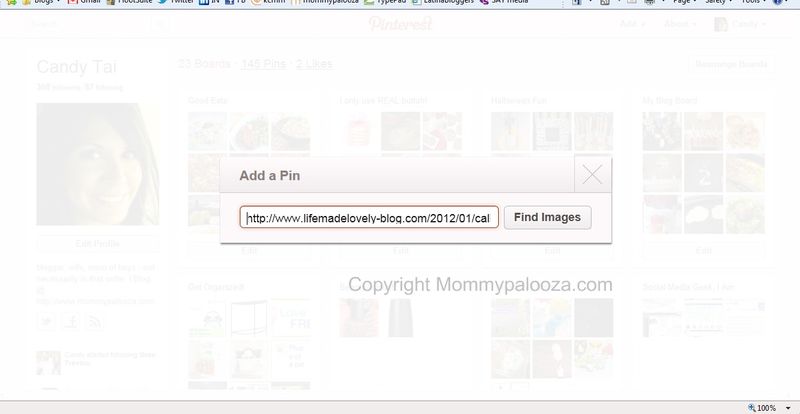
6. After putting in the link (either by pasting it in or typing it in manually), click the "Find Images" button and you'll get this new lovely on your screen:
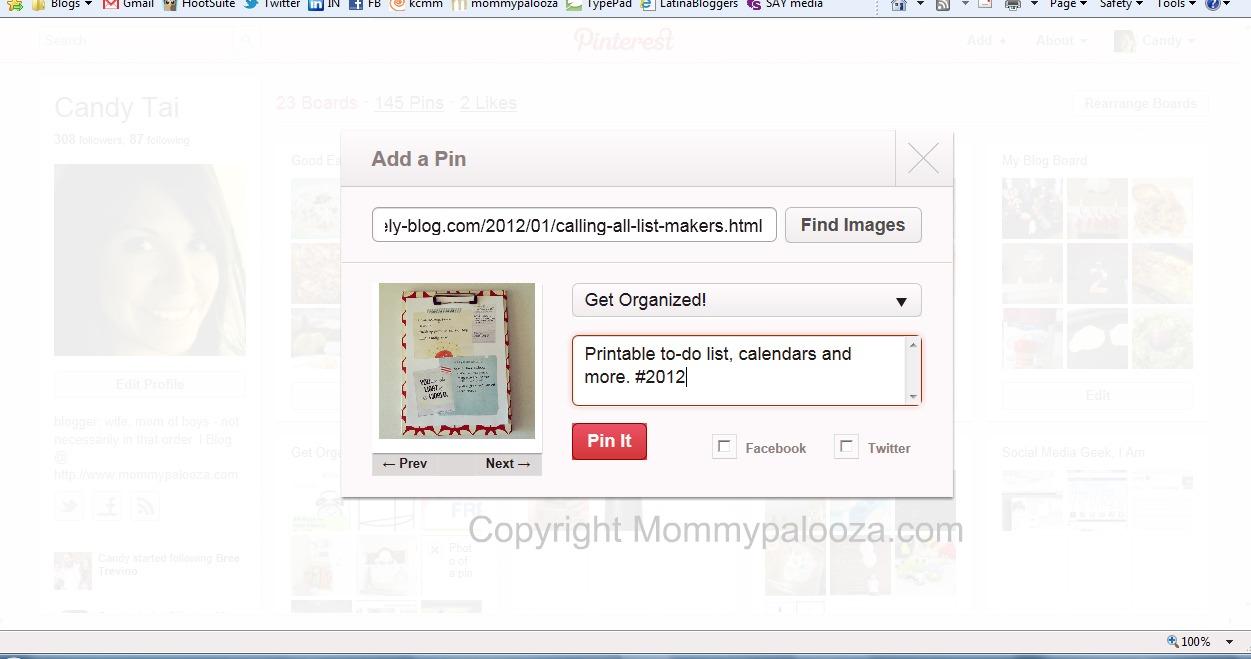
7. Notice the link to your pin is still visible and now there may be an image associated with the link, which will appear on the left side of the box that opens up. If you want to change the image or if there is no image that previews there, simply click "Next–>" to slide over to an alternate image. Notice also that there is a default "board" associated with this pin. In this case, it has defaulted to my "Get Organized" board. There is also a small box below that which is where you can type in any description or special notes that you want associated with this pin. I love this little text area. I use it to remind myself of why I am pinning this in the first place or to make other random notes that correlate to my pin. If you would like to change the default board that this pin is assigned to (e.g., instead of "Get Organized", I want this filed under something else), see #8 below. If not, simply click the red "Pin It" button to complete saving your pin.
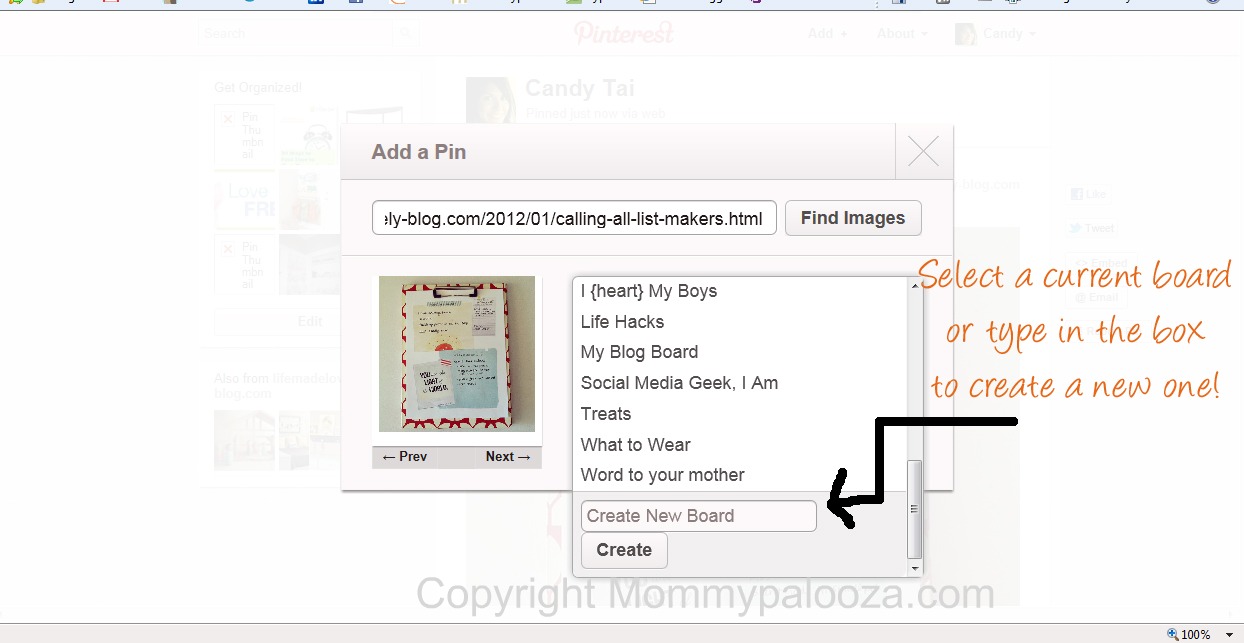
8. To change the board that this pin will be filed under simply click the drop-down box and you will see all of your current boards. Note that if you would like to start a new board category, you can simply start typing where the text "Create New Board" appears and then click "Create". A new board will now be created with the title you just typed! You'll then need to click the red "Pin It" button like in step 7 to complete saving your pin.
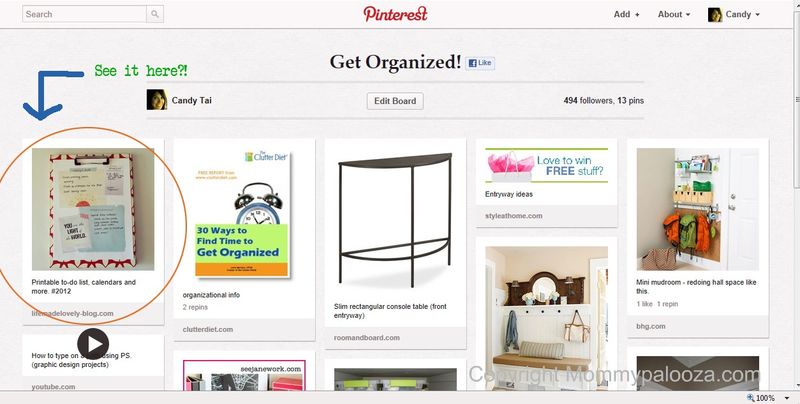
9. And there it is! Isn't she lovely? After clicking "Pin It", you will be taken to the board where you've saved your pin and you'll be able to see it – along with all of your other related pins – instantly!
10. Pat yourself on the back! You're officially "on Pinterest"!!

{FYI – the pin used in this example are free and beautiful printable lists and calendars from Life Made Lovely, which was a feature on my most recent {friday finds}.}
I don’t think I’ve ever been one of those who have commented to you about being lost on Pinterest, but I can’t even get on. When I click to log in through fb, it says I need an invite. Really? Why? That alone bugs me. I see benefit from being able to store cool sites in one place, but why do I need an invite?